Lens Focusing
In this section, we provide general guidelines for focusing lenses with Stereo Viewer support for Bottlenose Mono and Stereo.
Adjusting the Aperture and Focus
To adjust the aperture and focus, follow these steps:
- Ensure all locking screws (thumbscrew and grub screws) are not fully tightened. Screw holes are available at various positions.
- Rotate the aperture or focus ring to adjust the aperture or focus, respectively. For S-mount lenses adjust the lens in the adapter.
- For optimal aperture settings, align the white dot on the iris ring with the orange dot on the lens barrel, if available.
- Secure the adjustment by tightening all locking screws as needed.
Focus Adjustment using Stereo Viewer
After the lens assembly has been attached to the Bottlenose. Please focus lenses in a well-lit area and against a target that is sitting at the distance of your desired depth of focus.
- Connect the Bottlenose to your system and power it on as described here.
- Start Stereo Viewer and connect to Bottlenose, as described here.
- Once connected, press
Startto start streaming from Bottlenose. Bottlenose Mono cameras will automatically populate the left view of Stereo Viewer. Bottlenose Stereo cameras will show live frames in both left and right views. - Depending on your initial lens configuration your image may be over or underexposed. You can use
Device Control->exposureto adjust the exposure while the camera is streaming.- If the image is dark, please increase the exposure.
- If the image is too bright, please decrease the exposure.
- Manually adjust the lens to get a rough focus on the target object. This step reduces the time required for fine-tuning.
- If your lens has an aperture setting, optimize the aperture at this step. A smaller aperture (higher f-number) increases the depth of field, making more of the scene in focus. However, too small an aperture can lead to diffraction, reducing overall sharpness. Find a balance that provides adequate depth of field without sacrificing image quality. Repeat steps 5 and 6 until the coarse focus appears acceptable.
Ensure that for Bottlenose Stereo, both lenses have identical aperture settings. - Once the aperture is set, use any locking mechanism your lens might have, such as locking screws or rings, to prevent accidental adjustments.
- Check
Focus Aidcheckbox to plot the focus of the scene in the views of the Camera. The green line shows a quantitative measure of focus. Higher peaks indicate better focus of the image.
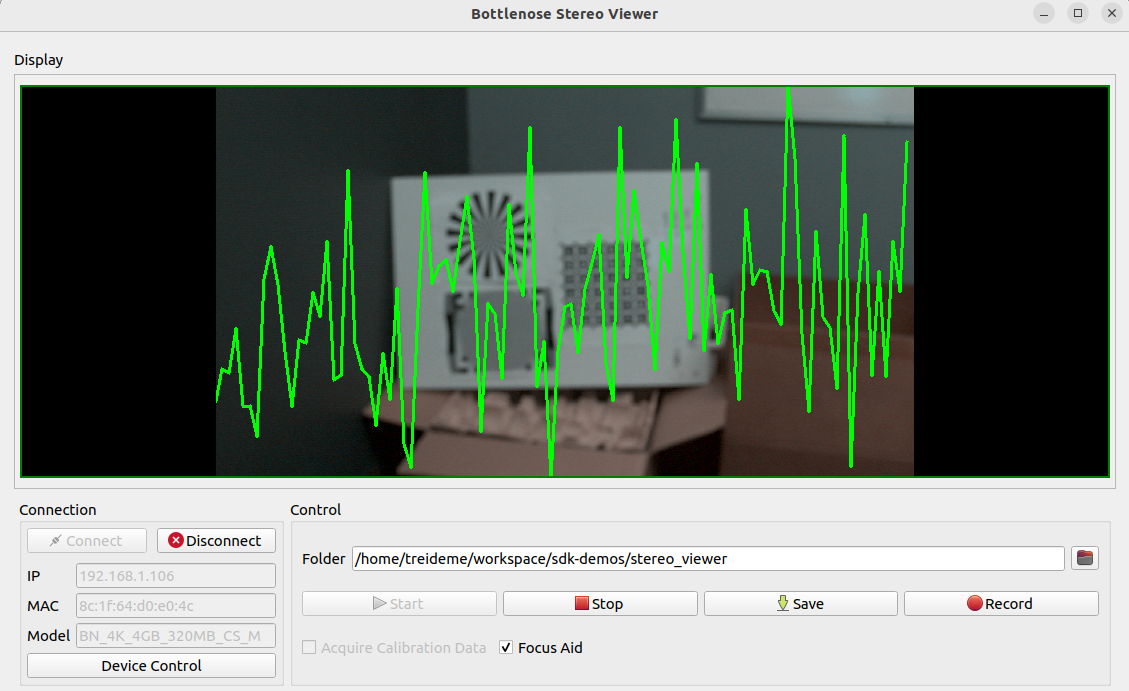
Focus Aid enabled in Stereo Viewer, Bottlenose Mono example shown
- You can use the highlight feature in Stereo Viewer by dragging a rectangle around your focus target in both views of the Stereo Viewer. The view will then display only the cut-out of your selection. To reset the view back to the full image view, right-click in the appropriate view that shows the crop.
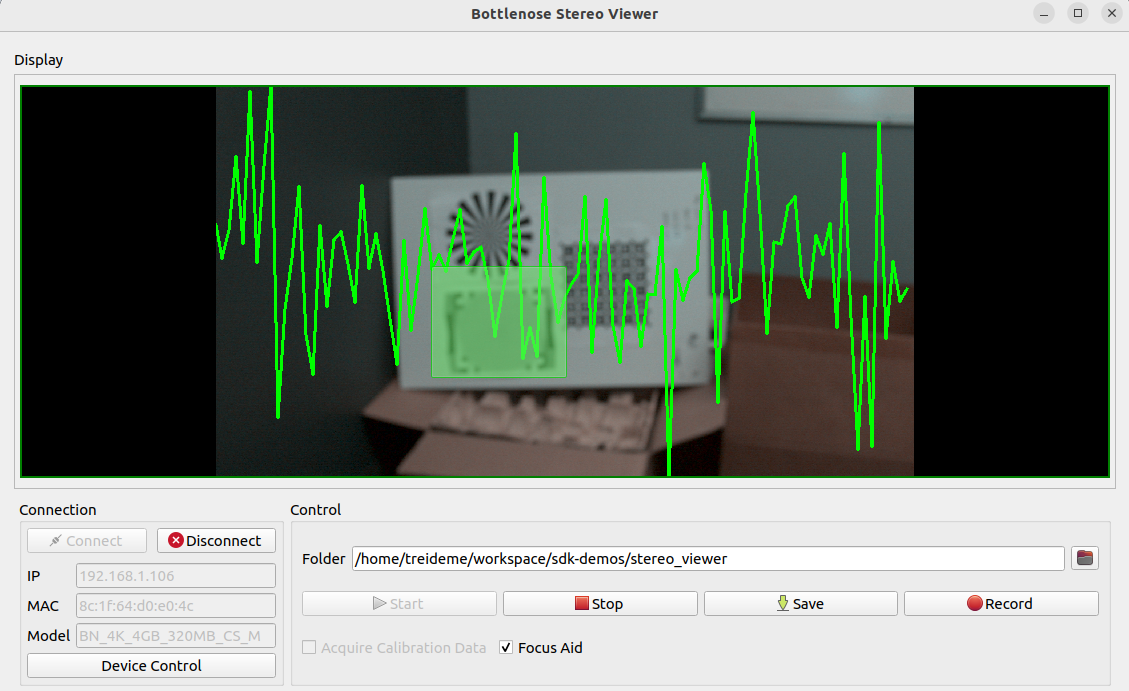
Focus Aid enabled in Stereo Viewer, Highlight of the Object of Interest is shown
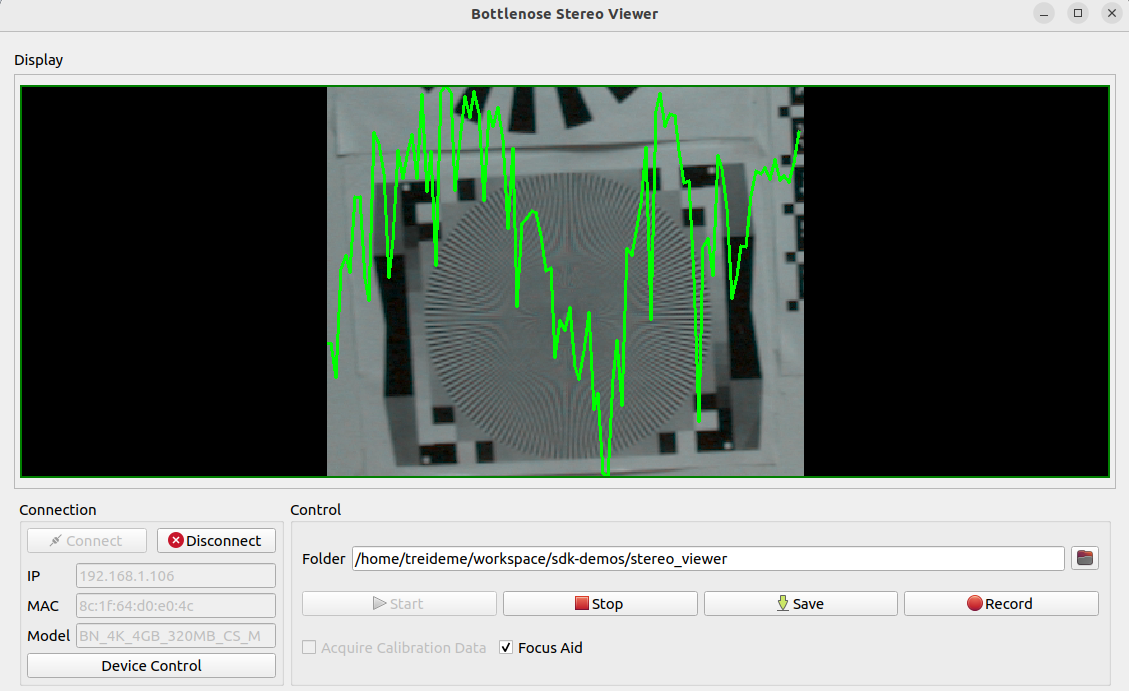
- Adjust the fine focus of your lens until the target object is in full focus. Maximize the plot of the green line. Peaks indicate points of maximal focus. Attempt to match the maximum value for your target of interest.
- Once your focus is set, use any locking mechanism your lens might have, such as locking screws or rings, to prevent accidental adjustments.
For Bottlenose Stereo Calibration and sensor alignment, please see here.
Updated 8 months ago
Did this page help you?