FileManager
The Bottlenose FileManager is an easy-to-use utility that makes operations such as firmware updates and AI weights transfer to your camera hassle-free.
Installing the Utility
The Bottlenose file utility should be installed on the computer that will interact with the camera
- Download the file utility
firmware_utility.exe
for your operating system here. - Double-click on the install the utility
Firmware Update
- Download the new
firmware-bottlenose.tar
firmware from here. - Start the file utility. For Windows, you can access Bottlenose Utilities from your Start Menu.

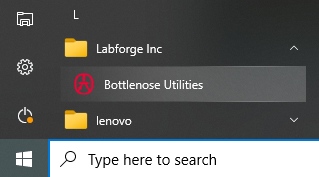
A view of the Bottlenose Utilities from Microsoft™ Windows® Start Menu
- Click the select button to connect your Bottlenose camera. Make sure the camera is connected and accessible.

Setting a Bottlenose Camera for firmware update with the file utility
- Set the Transfer type to Firmware

Setting Firmware update from with the Bottlenose utility.
- Select the newly download firmware file. It's most likely in Downloads, your default download folder. You can also directly drag and drop the file inside the file text box.

Dropping the firmware file for Bottlenose update
- Click upload to upgrade the camera.
Do not disconnect power or interact in any way with Bottlenose until the update process is complete.
The utility displays the status of the update. The camera also blinks its Ethernet status LED green to notify that the firmware upgrade is ongoing.

Bottlenose camera showing the Ethernet status LED.

Bottlenose utility showing the progression of a firmware upgrade
- Once the update is done without errors, you may now close the utility, restart your camera and use eBus Player to stream interact with the new firmware.

Bottlenose utility recommending to restart the camera after a firmware update.
Calibration Parameters
The file utility can be used to transfer calibration file into the camera for calibration. This utility currently support the calib.io format, the Kalibr format with only the Pinhole model, and a Bottlenose format. The Bottlenose format is a YAML format with each camera node containing the following fields.
- fx: the horizontal focal length
- fy: the vertical focal lenght
- cx: the horizontal principal point
- cy: he vertical principal point
- k1: the radial distortion parameters k1
- k2: the radial distortion parameters k2
- k3: the radial distortion parameters k3
- p1: the tangential distortion parameters p1
- p2: the tangential distortion parameters p2
- tvec: The translation vector specified as [tx, ty, tz]
- rvec: the rotation vector specified as [rx, ry, rz]
- width: the calibrated image width
- height : the calibrated image height
Parameters k2, k3, p1, p2 are optional and default to zero. Also, tvec and rvec can be omitted when all components are zeros.
The following shows an example calibration file for a stereo Bottlenose camera using the Bottlenose format.
cam0:
fx: 1987.056256568158
fy: 1987.056256568158
cx: 1093.500298952126
cy: 866.9088903543686
k1: -0.14981977634391333
k2: -0.08593589340885537
tvec: [0.0, 0.0, 0.0]
rvec: [0.0, 0.0, 0.0]
width: 1920
height: 1440
cam1:
fx: 1973.047227618774
fy: 1973.047227618774
cx: 1025.0670209192651
cy: 841.4264394134296
k1: -0.15244075354715458
k2: -0.05594888490548099
tvec: [0.1294776881086207, 0.0021832385850557375, -0.011641424658114402]
rvec: [-0.0018785701226511835, 0.014522091363680155, 0.0013294885018857211]
width: 1920
height: 1440
To upload a supported calibration file into a Bottlenose camera,
- Start the utility if it is not running yet.
- Click the Select button to connect to your Bottlenose camera
- Set the Transfer type to Calibration

Bottlenose utility Calibration file transfer
- Click the folder button to select your calibration file. You can also choose to drag and drop the file inside the file text box.

Bottlenose file utility dropping calibration file for upload.
- Click Upload and wait for confirmation.

Bottlenose calibration successfully updated.
- Quit the application when done.
AI Demo
Use this section to load an AI model onto the camera. The camera does not have enough onboard storage to keep the AI model at shutdown. Please do this step at every reboot or power-up of the camera.
AI Weights Transfer
- If you do not have a weights file yet, download one from here.
- Start the utility if it is not running yet.

A screenshot of the Bottlenose file utility
- Click the select button to connect your to Bottlenose camera
- Set the Transfer type to DNN Weights

Bottlenose file utility AI Weights transfer
- Select the weights file. You can also choose to drag and drop the file inside the file text box.

Bottlenose utility with a weights file been dropped for upload.
- Click Upload and wait for confirmation.

Weights transfer confirmation from Bottlenose Utility
Click Quit or X to close the utility and start eBus Player to stream from the camera with the new AI model.
Run and Launch the Viewer
Start eBUS Player to interact with Bottlenose.
Click on Select/Connect and choose the Bottlenose camera from the available devices. It may take up to 40 seconds for Bottlenose to boot after you connect the power.

A view from eBusPlayer of Bottlenose running a Tomato detector AI model uploaded from the file utility
Improving User Experience
Change the colour profile
If the colour does not look right, it may be due to the type of lighting used in your office or the trade show.
Please change the colour profile:

Enable Jumbo Frames
For better performance, we recommend enabling Jumbo Frames on your network and setting it to at least 9000. To do so, follow these steps. This is a one-time setup.
- Close any existing camera sessions. Example eBUS Player or the Labforge Bottlenose utility apps.
- Open the Network and Sharing Center.
- Click Change adapter settings.
- Right-click the network for which you want to enable jumbo frames and select Properties.
- Under the Networking tab, click the Configure button for the network adapter.
- Select the Advanced tab.
- Select Jumbo Frame and change the value from
disabled
to9014 Bytes
or to9KB MTU
, depending on your system. - Click OK to save and close the windows.

Network Properties Window showing the Jumbo Frame set to 9014 Bytes.
Updated 11 days ago